SAP Spartacus - Overriding components using Outlets
In this post i’ll be explaining the basic implementation of outlets how you can use in your project and customize according to your requirements.
Outlets : #
It allows you to customize the UI that is provided by default and letting you to plug the custom UI into the DOM.
How to use outlets in our code ? #
We need to modify our code to compile it without errors
- In
*.component.tsfile we need to add import below code:
import { OutletPosition } from "@spartacus/storefront";and also we need to define the variable :
outletPosition = OutletPosition;at last we can use this in our *.component.html file:
<!-- Outlet Position Before -->
[cxOutletPos]="outletPosition.BEFORE"
<!-- Outlet Position After -->
[cxOutletPos]="outletPosition.AFTER"
<!-- It will replace the whole section with our outlet -->
[cxOutletPos]="outletPosition.REPLACE"
Note : If your code is not compiling then we need to modify
tsconfig.jsonto ignore the typescript error:
{
  ...
  "angularCompilerOptions": {
    ...
    "strictTemplates": false
  }
}
Table of Contents #
Template-Driven Outlets #
The simple way to add the changes in UI that which we can add by using ng-template component. The cxOutletRef is used to add a reference to an outlet. The cxOutletRef directive expects the slot position or template name which needs to be passed. Every layout template has pre-defined slots in Spartacus.e.g
header
footer
cart
homepage
Example Template-Driven Outlets: #
For our example, we will be using Section1 slot on homepage.
<ng-template cxOutletRef="Section1" [cxOutletPos]="outletPosition.BEFORE">
  <h1 class="text-center m-5">Hot SALE</h1>
</ng-template>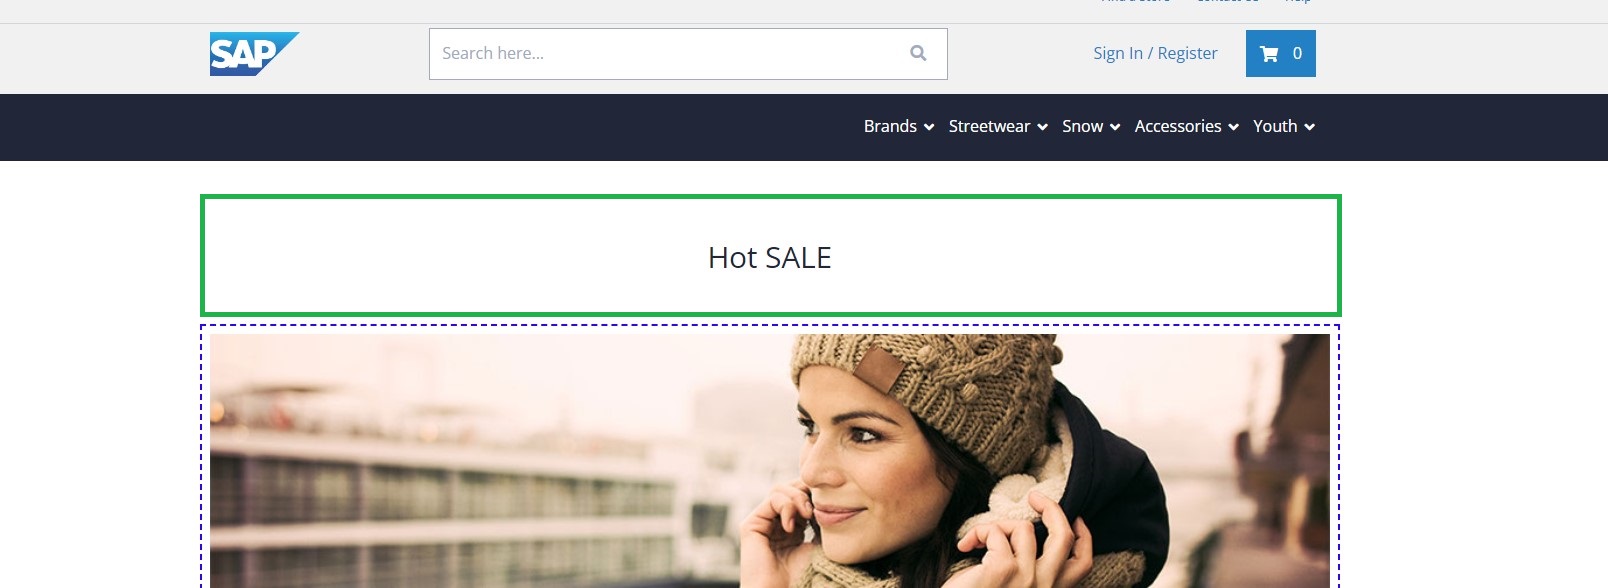
<ng-template cxOutletRef="Section1" [cxOutletPos]="outletPosition.AFTER">
  <h1 class="text-center m-5">Hot SALE</h1>
</ng-template>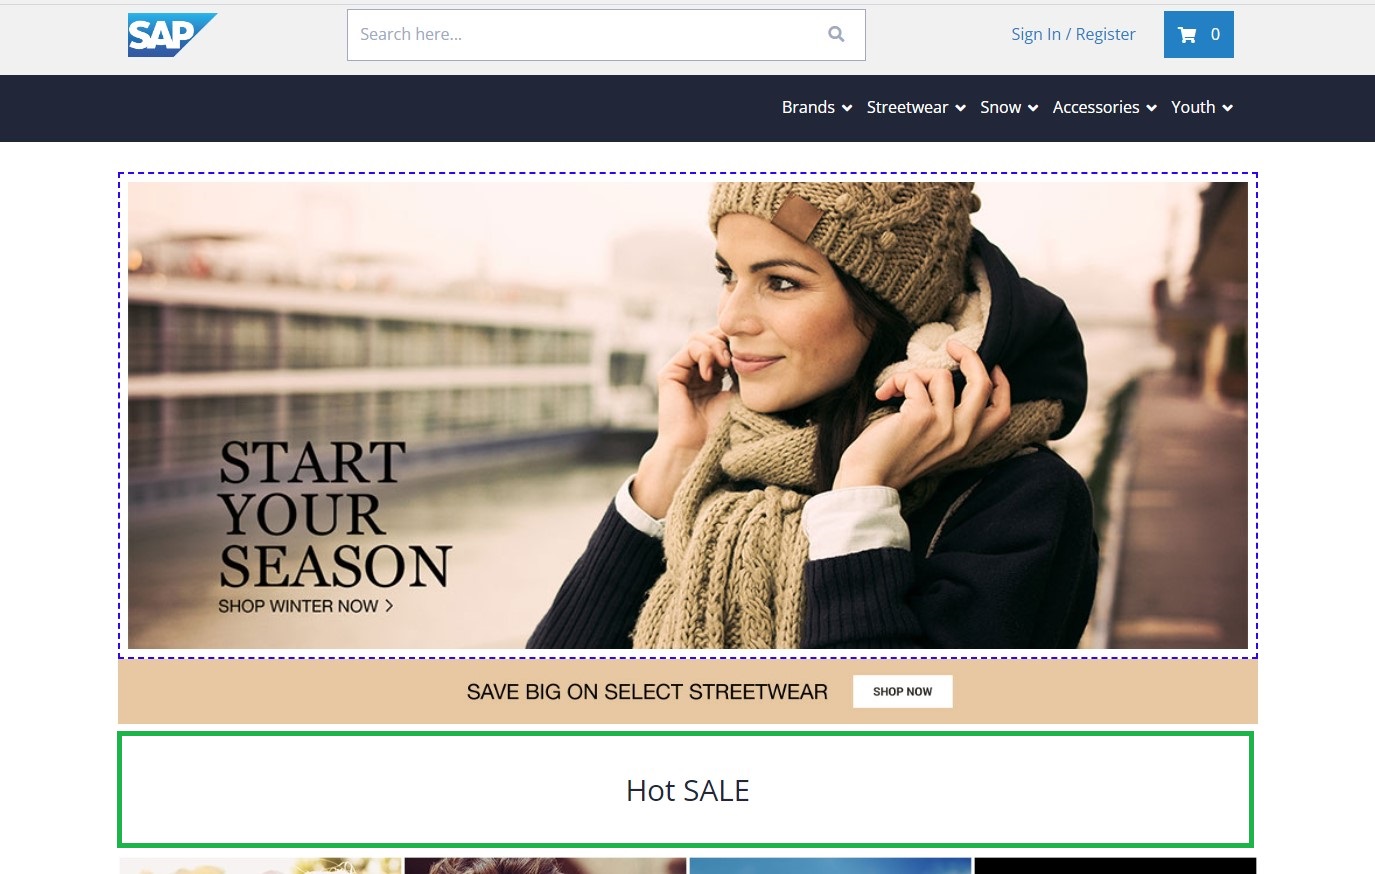
<ng-template cxOutletRef="Section1" [cxOutletPos]="outletPosition.REPLACE">
  <h1 class="text-center m-5">Hot SALE</h1>
</ng-template>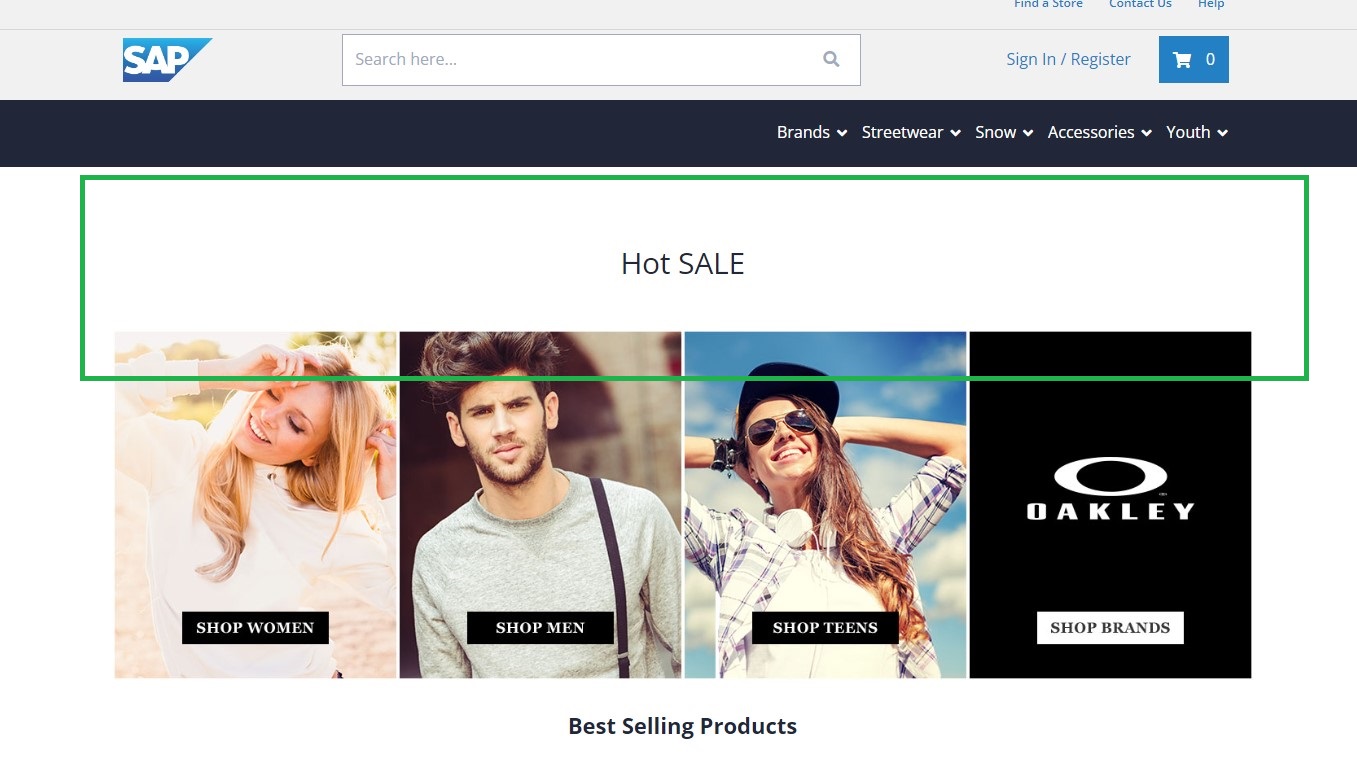
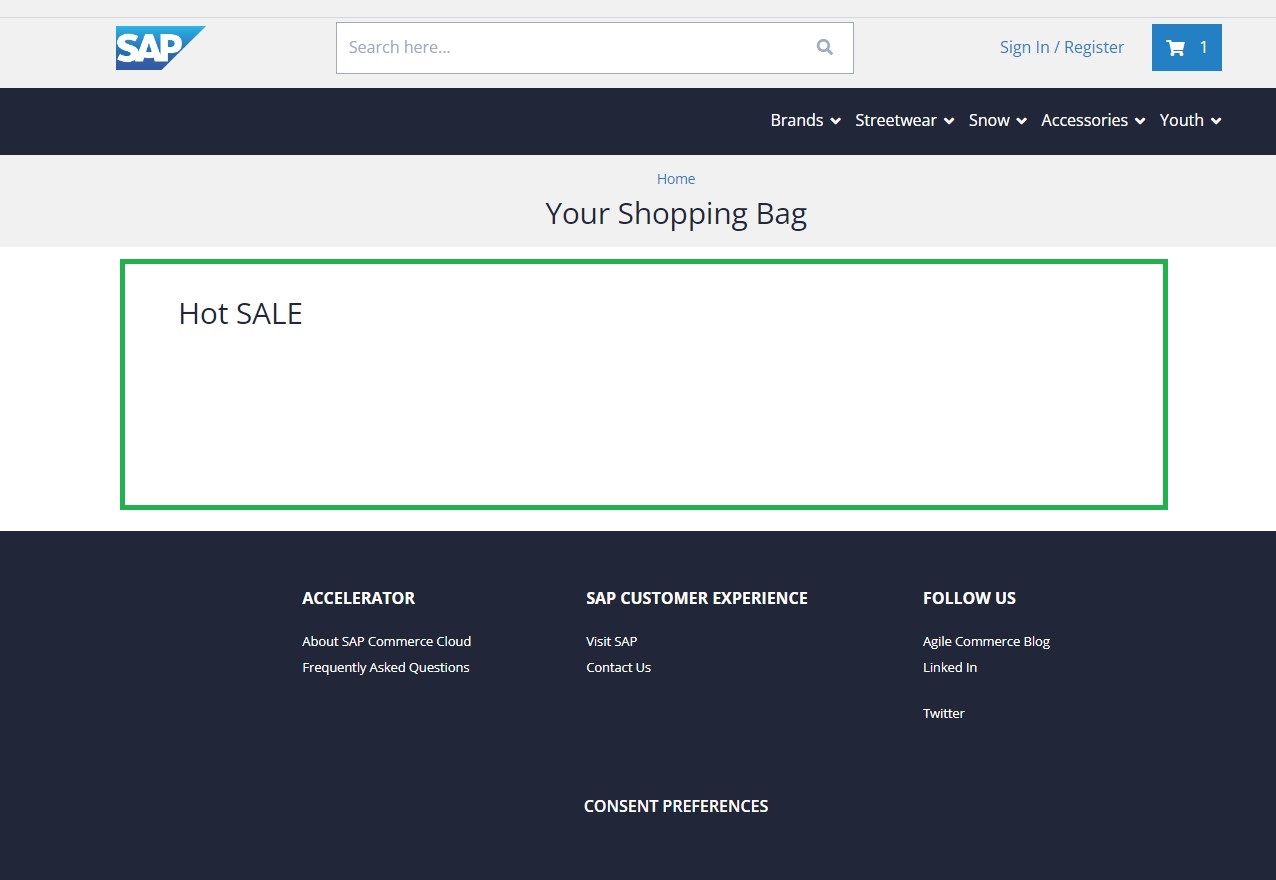
If you want to replace the whole template then we need to pass the template name to cxOutleRef direction name as shown in the below example.
Layout templates example in spartacus:
LandingPage2Template
ProductListPageTemplate
ProductDetailsPageTemplate,
CartPageTemplate
ContentPage1Template etc.,
Note: Make sure to add it to imports in the app module file because cxOutletRef is a part of OutletModule.
<ng-template
  cxOutletRef="CartPageTemplate"
  [cxOutletPos]="outletPosition.REPLACE"
>
  <h1 class="text-center m-5">Hot SALE</h1>
</ng-template>
Component-Driven Outlets #
Now let’s add a component dynamically outside the UI, using typeScript in spartacus using component driven outlets.
Implementation of component driven outlets :
First we need to create a component e.g.
custom-outletsNow import the component in the
AppModulefile and declare aprovidersarray and add the code as shown below example where we are importing theprovideOutletfrom@spartacus/storefrontinside which we need to declare three options i.e.
| Options | Description |
|---|---|
id | Where we want the change |
positon | What we want to do with it means we can replace it , change the postion using before and after. |
component | Which component we want to show. |
Usage: #
We will be showing something like PLP Page product in our custom outlet i.e product image, product title , rating, price and CTA button in ContentPage1Template.
- In
*.module.tsfile we need to add import below code :
providers: [
    provideOutlet({
      id: 'ContentPage1Template',
      position: OutletPosition.REPLACE,
      component: CustomOutletsComponent,
    }),
],- In
*.component.tsfile we need to add import below code:
  hotProduct$: Observable<Product> = this.productService.get('300310300');
  currentProduct$: Observable<Product> =
    this.currentProductService.getProduct();

  constructor(
    private currentProductService: CurrentProductService,
    private productService: ProductService
  ) {
    this.currentProductService.getProduct().subscribe(console.log);
}- At last we can use this in our
*.component.htmlfile:
<cx-product-list-item
  *ngIf="hotProduct$ | async as product"
  [product]="product"
>
</cx-product-list-item>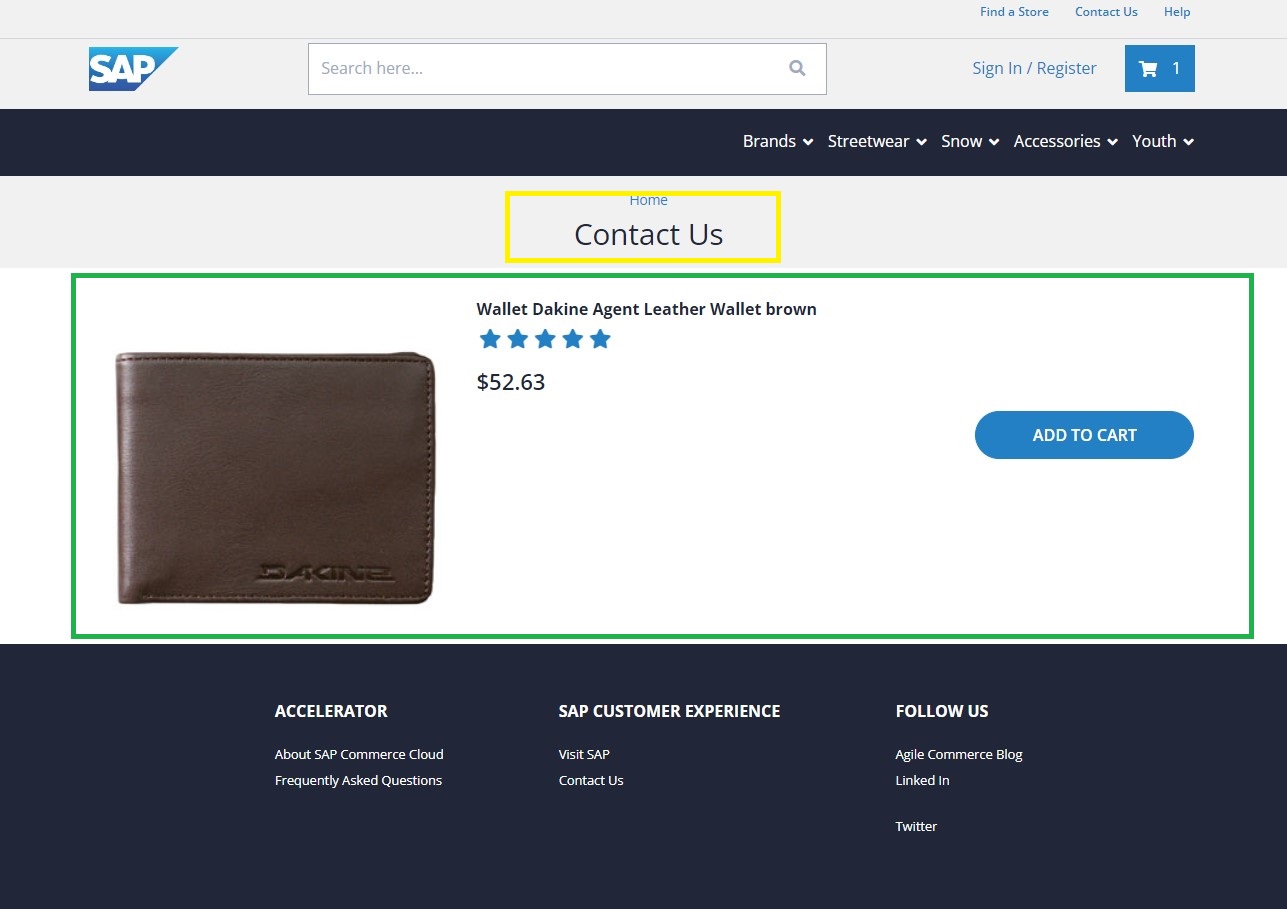
Resourse :