How to create carousel in angular?
Step 1 : #
- Create a new project in angular.
ng new yourProjectNameStep 2 : #
Go inside the project folder and run the command
ng serve. This will run the application in the browser on port 4200.You will be able to see the output like this for example I have create the project with the name as
angular-carousel.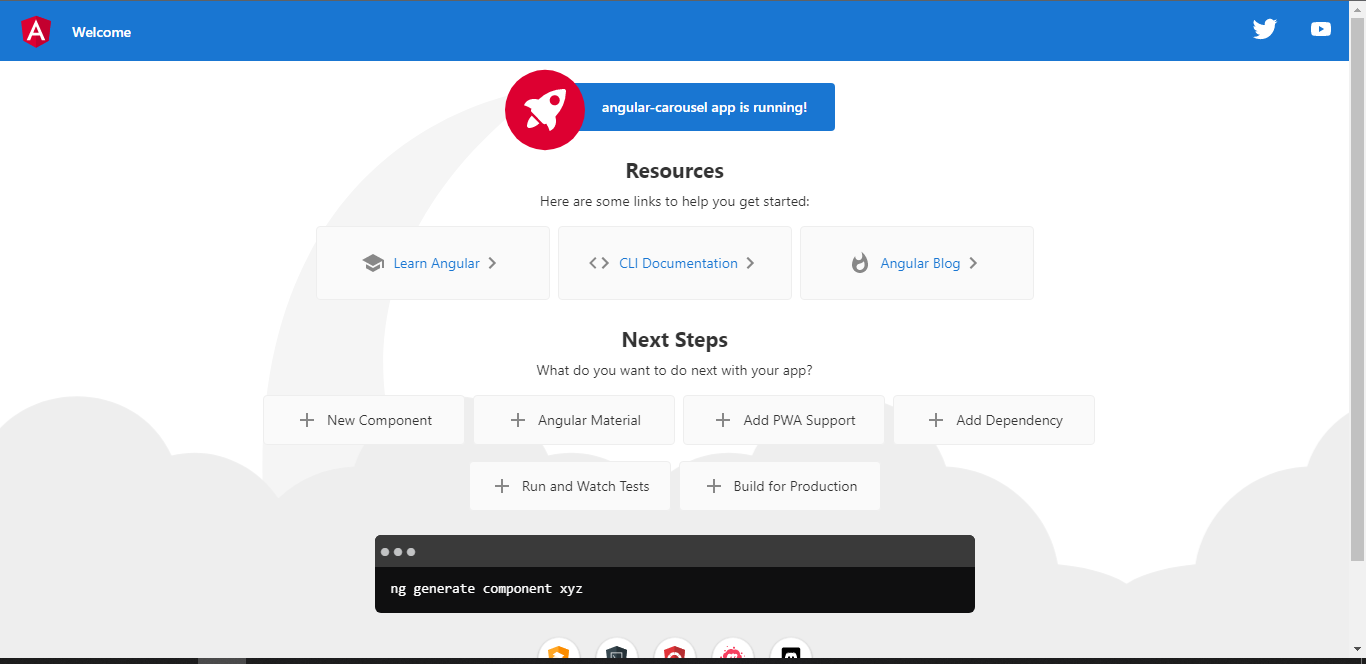
Step 3: #
- Now install the required dependencies.
npm install jquery --save
npm install slick-carousel --save
npm install ngx-slick-carousel --save
After installing the dependencies you need to configure that as well. For that you need to do some modifications in the
angular.json.Copy and paste below changes in the file inside
buildobject.
 "styles": [
              "src/styles.scss",
              "node_modules/slick-carousel/slick/slick.scss",
              "node_modules/slick-carousel/slick/slick-theme.scss"
            ],

"scripts": [
              "node_modules/jquery/dist/jquery.min.js",
              "node_modules/slick-carousel/slick/slick.min.js"
            ]
Step 4: #
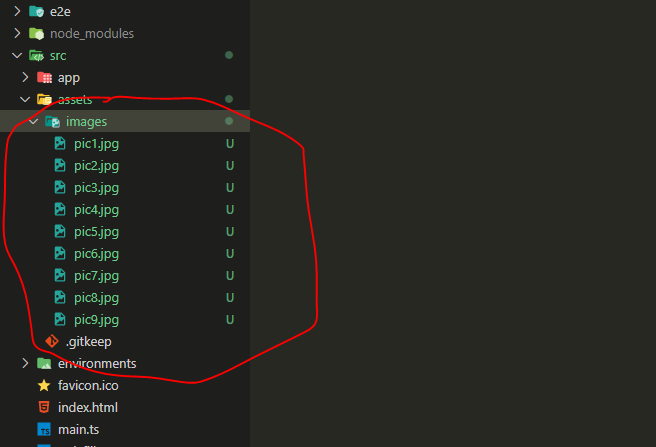
Now download the images from google and save it inside the assets folder of the project with folder name as images or you can strucutre it in your way and name them if you want to.
Step 5: #
After adding the images go inside
appwhich is insidesrc- [src/app].Now create an empty folder name it as
component.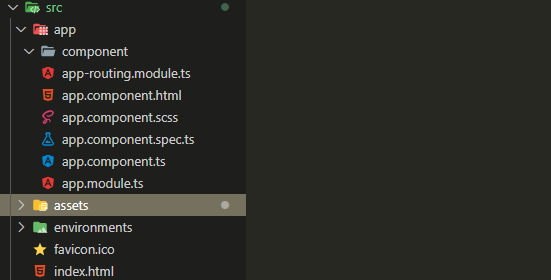
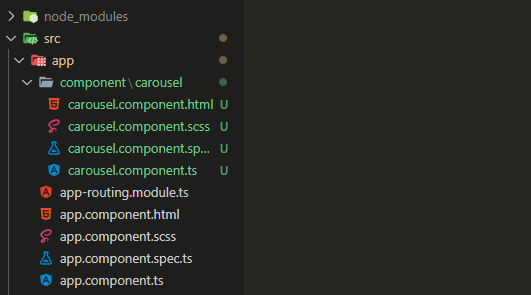
Now we need to create the component for the carousel.
ng g c component/carouselAfter creating the component you will be able to see something like this in the folder structure.
Now we need to check whether that component is imported correctly or not inside the
app.module.tsfile.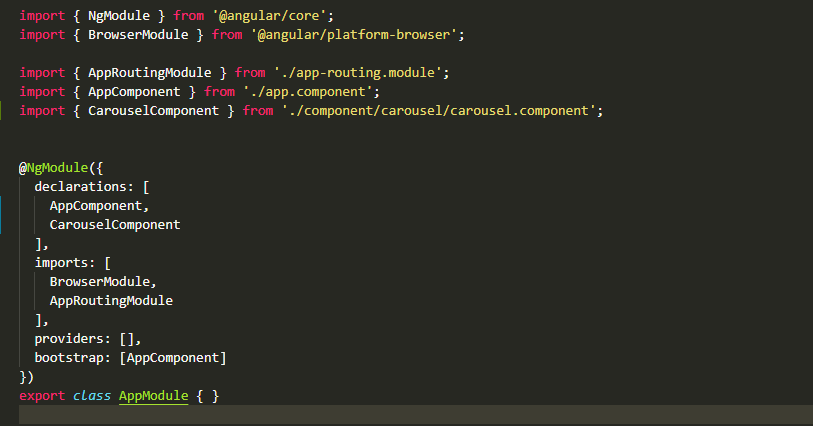
Now we need to import
SlickCarouselModuleinside theapp.module.tsfile.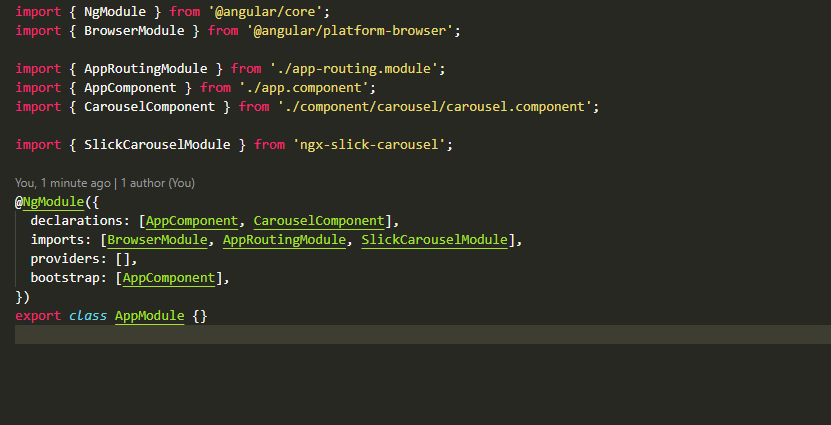
Step 6: #
- Now we need to add the changes inside
carousel.component.tsfile.
/* import these on the top*/

import { Component, OnInit, ViewChild } from "@angular/core";
import { SlickCarouselComponent } from "ngx-slick-carousel";
/*paste inside export class */
@ViewChild('slickCarousel') slickModal!: SlickCarouselComponent;
constructor() {}
/* path for the images inside folder*/
slides = [
{ img: '../assets/images/pic1.jpg' },
{ img: '../assets/images/pic2.jpg' },
{ img: '../assets/images/pic3.jpg' },
{ img: '../assets/images/pic4.jpg' },
{ img: '../assets/images/pic5.jpg' },
{ img: '../assets/images/pic6.jpg' },
{ img: '../assets/images/pic7.jpg' },
{ img: '../assets/images/pic8.jpg' },
{ img: '../assets/images/pic9.jpg' },
];
/* configs for the slider */
slideConfig = {
slidesToShow: 3,
slidesToScroll: 1,
autoplay: true,
infinite: true,
speed: 1400,
autoplaySpeed: 2000,
arrows: true,
cssEase: 'ease',
dots: false,
fade: false,
easing: 'linear',
pauseOnHover: true,
responsive: [
{
breakpoint: 1024,
settings: {
slidesToShow: 3,
slidesToScroll: 1,
infinite: true,
},
},
{
breakpoint: 600,
settings: {
slidesToShow: 2,
slidesToScroll: 1,
},
},
{
breakpoint: 480,
settings: {
slidesToShow: 1,
slidesToScroll: 1,
},
},
],
};
ngOnInit(): void {}- After adding the changes in the
tsfile we need to add the changes in thecarousel.component.htmlfile.
<ngx-slick-carousel
  class="carousel"
  #slickModal="slick-carousel"
  [config]="slideConfig"
>
  <div ngxSlickItem *ngFor="let slide of slides" class="slide">
    <img
      src=""
      loading="lazy"
      alt=""
      width="98%"
      height="300.9px"
    />
  </div>
</ngx-slick-carousel>- To make that work we need to do a small change in
app.component.htmlfile.
<app-carousel></app-carousel>Now everything is done and you can see the output.

See live demo : Click here